Help Docs
How to get started
With EDocGen, you can generate Word and PDF documents from existing Word and PDF templates.
Let's say you want to generate conformance certificates.
Step1: Add tags for dynamic fields
The first step is to add dynamic fields (Ex: Customer Name) in your template.
You can open your template in Microsoft Word / PDF editor and make changes. If you are familiar with mail merge, you know how to go about adding tags for dynamic fields. If not, I'm going to show you with few examples in the following section.
EDocGen supports the dynamic population of text, tables, images, hyperlinks, etc. Once you place relevant tags in the template, the system understands that those are dynamic fields for filling. By placing the tags, you are converting your existing template into EDocGen ready template. Yes, it is that simple.
Let's look at how to create merge tags for each of these.
Text Fields:
Surround your dynamic text field with { } (single flower brackets). Please ensure that the tag field is a single word without spaces.
If you want a multi-word tag name, combine individual words using underscore (_).
e.g. {name}
{Phone_Number}
{Email_ID}
-
Add
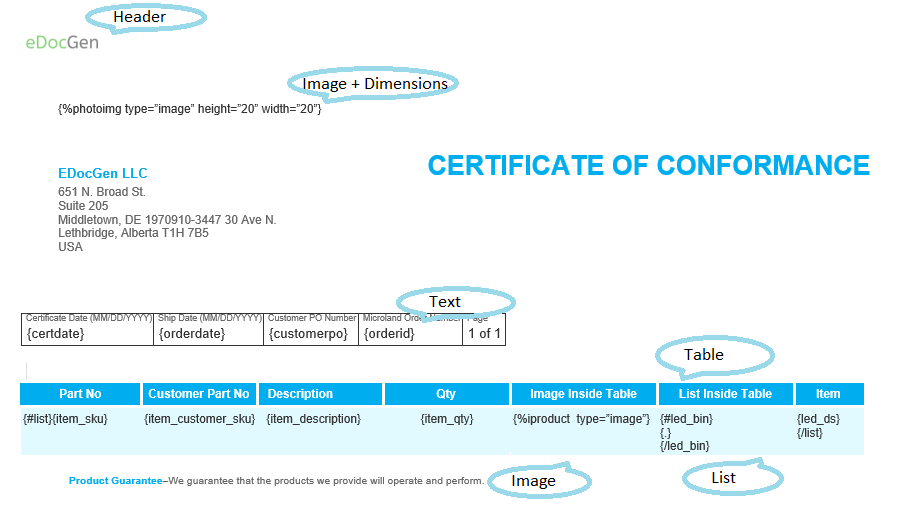
{#tableid}at the beginning of the table and{/tableid}at the end of the table as depicted below. It can be any name and shouldn't have spaces - As in dynamic text fields, column names should be placed within { }
| Column 1 | Column 2 | Column 3 |
|
{#tableid} {Column1} |
{Column2} |
{Column3} {/tableid} |
Below is the example of the personal details table.
|
Name |
Age |
Address |
|
{#details} {name} |
{age} |
{address} {/details}
|
Notice starting of table with {#details} tag and ending with {/details} tag. The system would loop over the data to populate multiple rows in this table. Similarly, the above sample template uses {#list} {/list} tags for the table.
Images Population: – Populate images into a document template at runtime. The image is auto-sized to the set dimensions.
{%image id=”imagemarker” width=”454” height=”670”}
Use the same approach for populating online images, QR codes, bar codes, etc.
Content Block – Auto-fill subtemplates, paragraphs, and content blocks into the document template using the following tag.
{contentblockid type=”paragraph”}
Lists and Loops – Following loop creates a list of games
{#Games}
-{Game}
{/Games}
In the above example template, you can see {#led_bin}{.}{/led_bin} that creates the list
Conditional Statements – IF/ELSE for customizing document creation as per business requirements
{#Game == "Golf"}
Let's play Golf
{/}
Calculations – Arithmetic operators +, -, *, / for performing calculations on
dynamic data
Hyperlinks
To create hyperlinks dynamically, use {~} tag in your template. The following examples illustrate how to create hyperlink tag.
{~linkname}
{~Enter_Name}
{~Enter_Name +" " +linkname}
Step 2: Document Upload
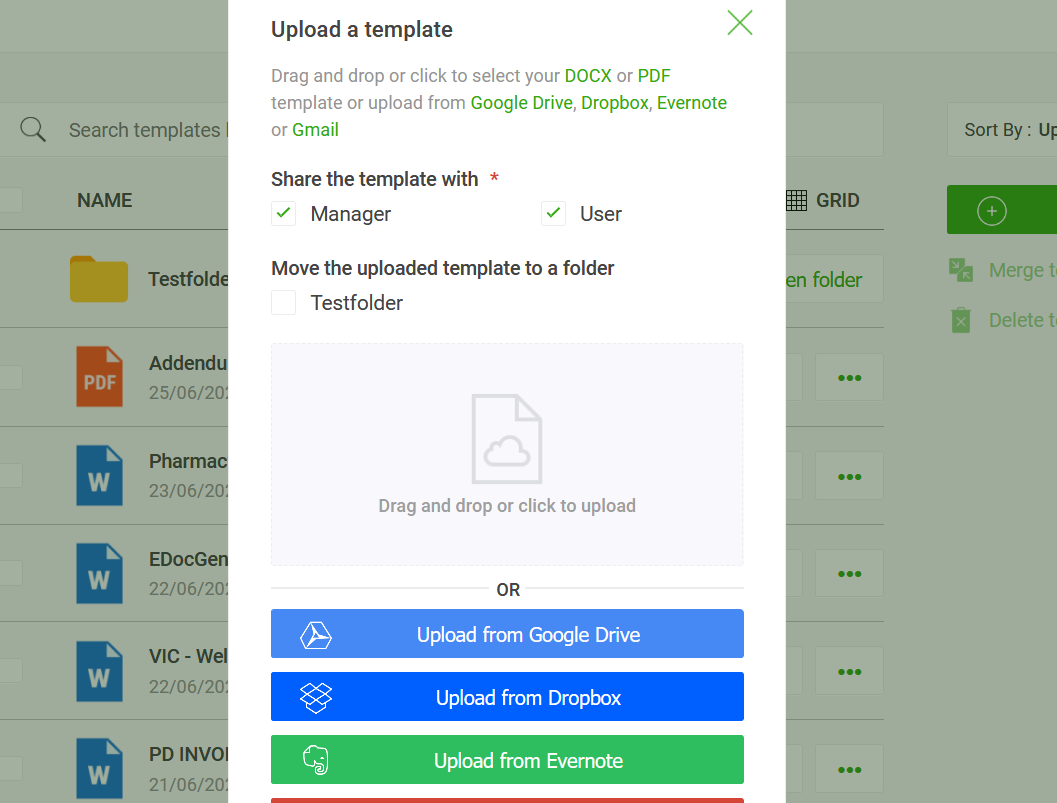
Upload your document by clicking the 'Upload Template" button at the right top. Currently, the system accepts only 'DOCX" and PDF templates. While uploading a template, you can set access permissions.
Step 3: Document Generation
Against your document template, click on the "Generate" button. Select the relevant option for populating the template.
- Selecting the "Generate Document using form inputs" option creates a fillable form for entering dynamic data.
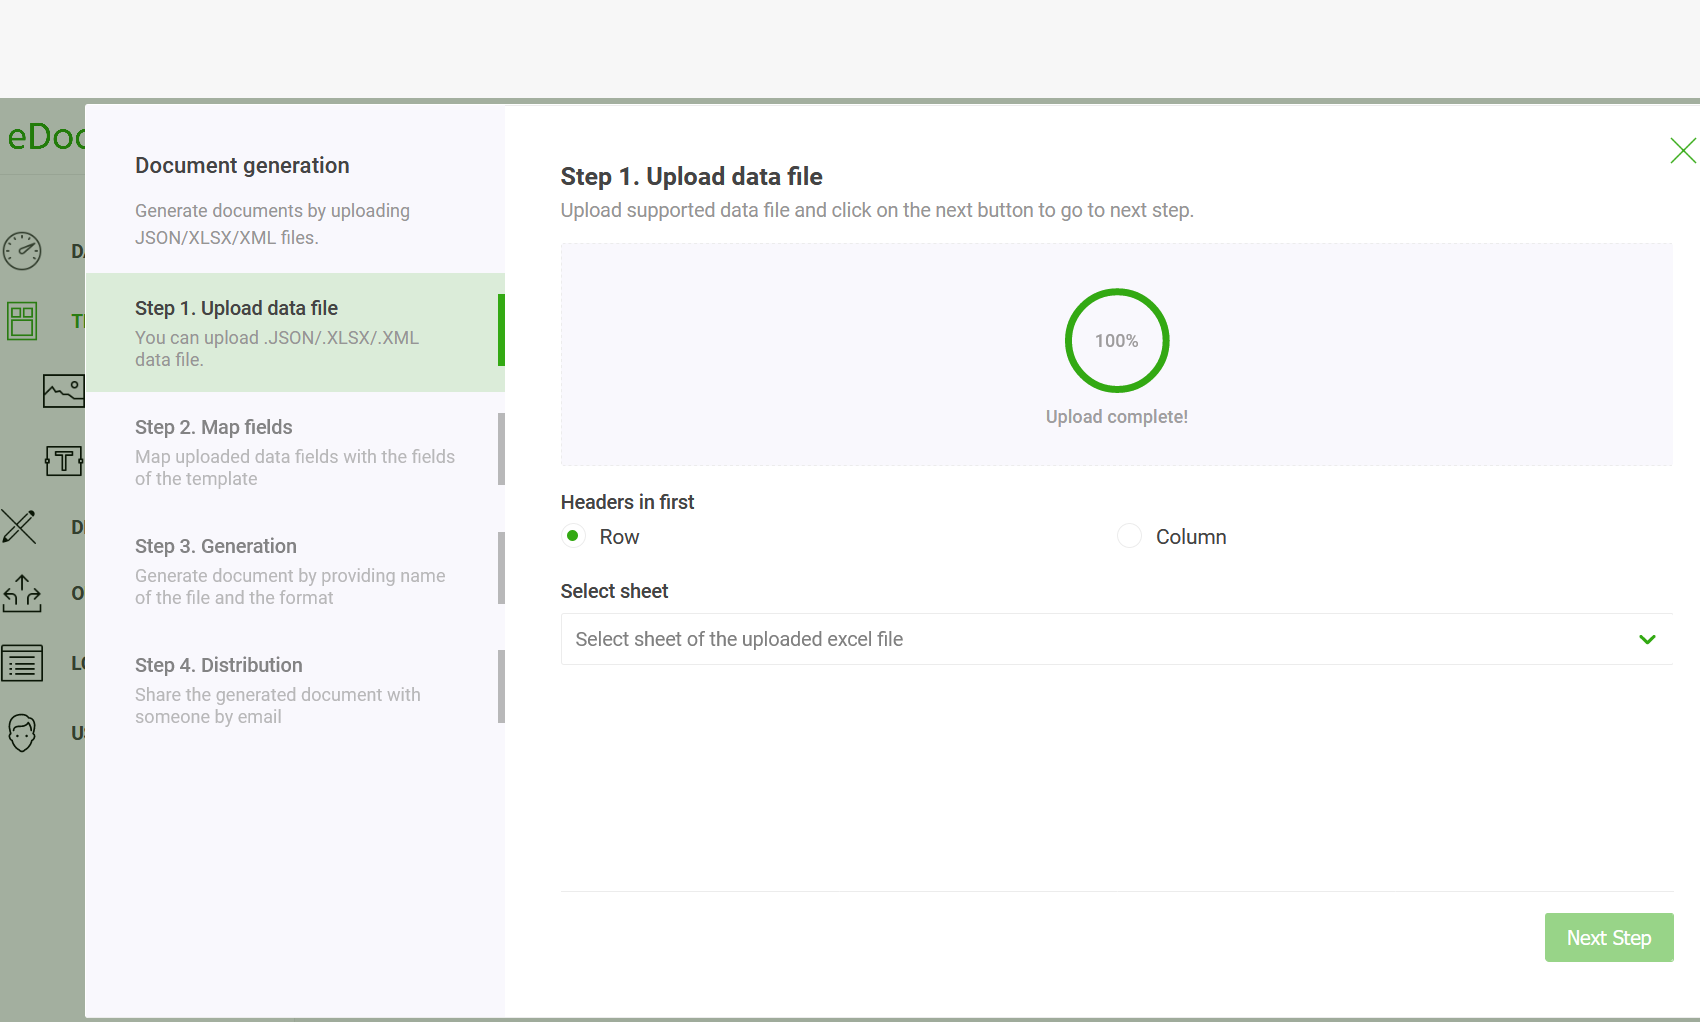
- Selecting "Upload Data" for bulk document generation allows you to upload the data file that populates into the template.
- Choose "Database Input" to batch generates documents from your database.
- Choose "CRM Input" to batch generates documents from your Salesforce or D365 CRMs.
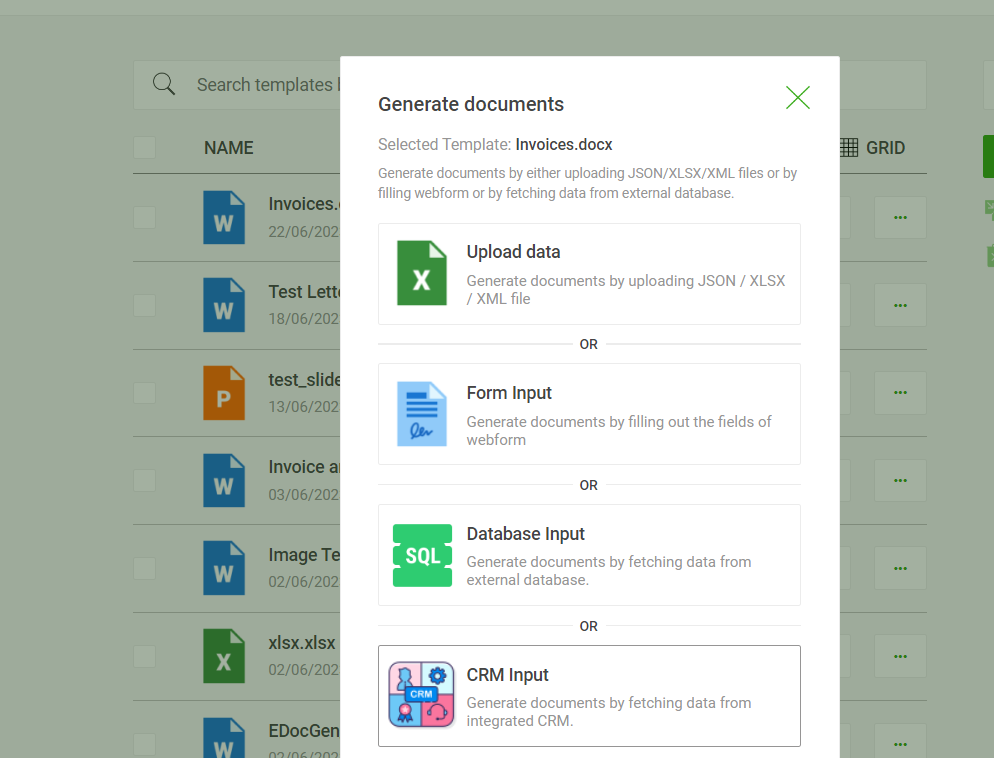
EDocGen supports the filling of Excel, XML, and JSON data into the document template for generating bulk documents. After data file upload, map your dynamic field names with data file headers.
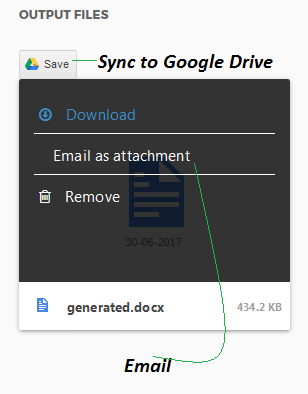
Step 4: Document Output
By default, all generated documents are placed in the Output folder. You will find your file there. Hover over the document and you will see options to print, download, mail, or sync it to cloud storage.