
TL;DR: EDocGen maps XML elements — from ERPs, EDI feeds, or legacy databases — onto existing Word or PDF templates to auto-generate print-ready, compliant PDFs. No XML transformation required. Generate one document or thousands in a batch, through the UI or the REST API. Supports tables, images, conditional content, calculations, QR codes, and e-sign/distribution integrations.
IT systems and databases commonly offer the option to export data in XML format. XML is widely used for data interchange, storage, and analysis. PDF is a widely recognized format for documents, known for being cross-platform and print-ready.
Business users often find a need to populate Word/PDF templates with XML data to create PDF documents. So a tool that automates the population of XML data to PDF templates enhances productivity and saves time.
Generally, PDF documents are created either for compliance or for sharing outside of the organization. Thus XML to PDF generation solutions must create PDF documents, without any deviation from prescribed branding guidelines.
Before a no-code mapping tool, XML-to-PDF conversion was typically done with one of a few code-heavy pipelines:
XML + XSLT (FO-specific) → XSL-FO → Apache FOP → PDF.To produce PDF documents from XML data using these methods, you must engage an IT team. Getting time from the resource-constrained IT team is difficult. Moreover, the templates undergo changes. Every time a template is modified, developers have to make associated code changes. Hence, these are expensive both from a development and maintenance perspective. Empowering business users to have complete control over templates and PDF generation, improves business performance.
If you are looking for a DIY system to generate documents from XML data then EDocGen is the solution to go with. It is the simplest and fastest way for business users to fill PDF or Word templates with XML data to create PDF documents in batch. Generate PDF documents by auto-filling XML data into
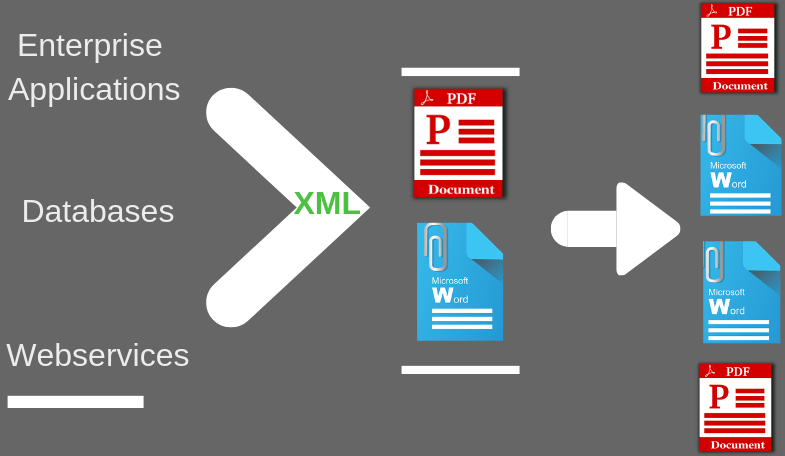
It supports the dynamic population of text, tables, content blocks, hyperlinks, and images from XML data. It also supports multi-lingual, conditional statements (if-else), QR Codes, and calculations.
The USPs of XML to PDF converter include the generation of
The following sections describe how to convert XML to PDF using EDocGen. There are two methods for populating XML files: using the App UI or API.
A P&C insurer issues policy certificates. Policy data — insured details, coverage lines, premium, and effective dates — is exported nightly from the policy admin system as XML. The XML is populated into a standard certificate template to produce individually addressed, print-ready PDFs. Premium totals are calculated automatically from the coverage lines. The system then emails each certificate to its policyholder and syncs a copy to the document management system.
This removes the manual copy-paste from the policy system into a template — and removes the need to route every template tweak through IT.
Below is a simplified policy certificate XML export and the tags used in the corresponding template.
<?xml version="1.0" encoding="UTF-8"?>
		<Policies>
		  <Policy>
			<Policy_Number>POL-2024-11823</Policy_Number>
			<Effective_Date>01-09-2024</Effective_Date>
			<Expiry_Date>31-08-2025</Expiry_Date>
			<Insured_Name>Acme Manufacturing LLC</Insured_Name>
			<Insured_Address>220 Industrial Parkway, Austin, Texas</Insured_Address>
			<Email>[email protected]</Email>
			<Logo>614aeef71ba09917fc7f6155</Logo>
			<Language>English</Language>
			<Coverages>
			  <Coverage>
				<Line>General Liability</Line>
				<Limit>1,000,000</Limit>
				<Premium>4,200</Premium>
			  </Coverage>
			  <Coverage>
				<Line>Property</Line>
				<Limit>2,500,000</Limit>
				<Premium>6,800</Premium>
			  </Coverage>
			</Coverages>
			<Payment_Terms>Annual, due on effective date</Payment_Terms>
			<Notes>Package discount applied for multi-line policy.</Notes>
		  </Policy>
		</Policies>
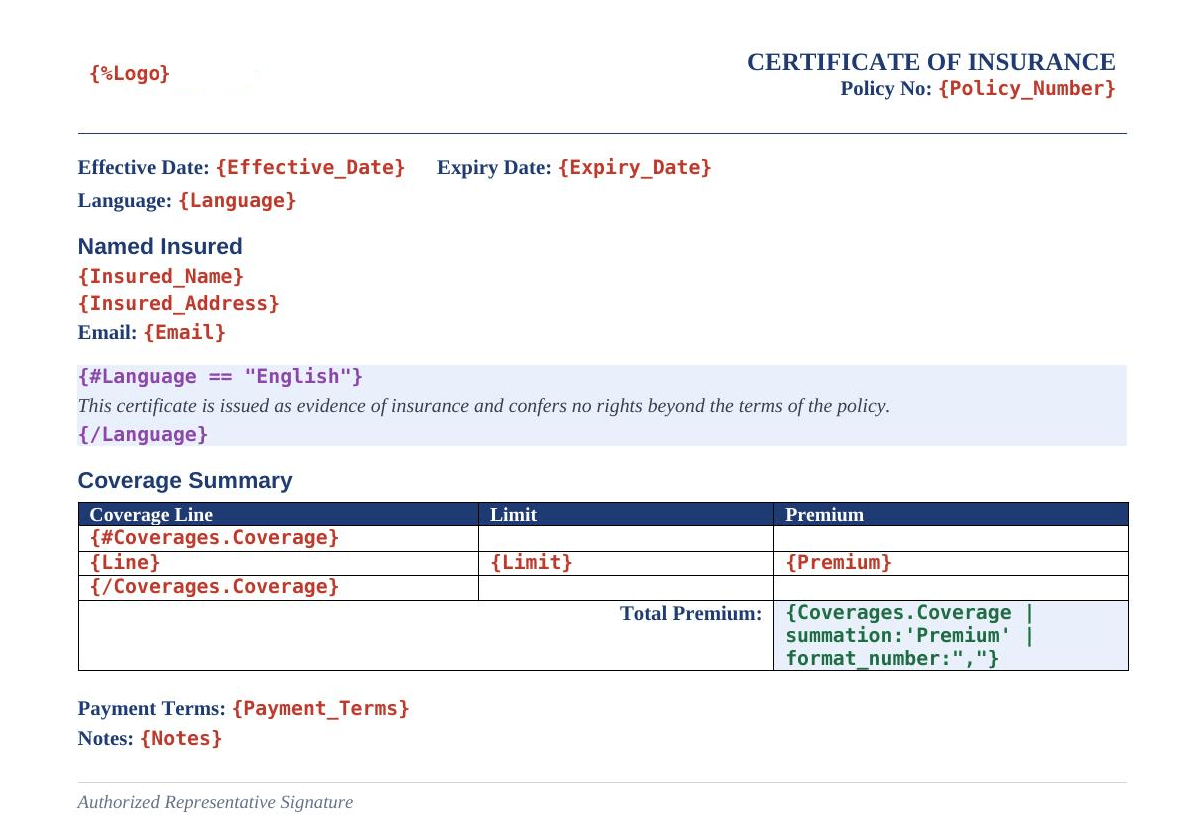
Tags are added to the Word or PDF template to mark fields that get replaced or looped over.
Text fields: {Policy_Number} and {Insured_Name} are plain text tags — any word inside {} is replaced with the matching XML element's value.
Table (loop): The coverage table loops over every <Coverage> element under <Coverages>. The table row starts with {#Coverages.Coverage} and ends with {/Coverages.Coverage}; column tags {Line}, {Limit}, and {Premium} sit inside the loop and repeat once per coverage line.
Image: {%Logo} populates the insurer's logo from a URL, a Base64 string, or an uploaded file ID. Dimensions are optional: {%Logo:100:50} (width × height in px).
Conditional block (if-else):
{#Language == "English"}
		  This certificate is issued as evidence of insurance...
		{/Language}
This drives language-specific certificate wording from a single master template — useful when the same template serves multiple regions.
Calculation (summation + formatting):
{Coverages.Coverage | summation:'Premium' | format_number: ","}Sums the Premium value across every coverage line and formats the result with comma separators — no pre-calculation needed in the XML feed.
{#Coverages.Coverage} needs a matching {/Coverages.Coverage}); avoid spaces or special characters in tag names; and name template tags to match XML element names exactly to skip the manual mapping screen.
XML's element nesting maps naturally onto loop-inside-loop templates — e.g., a certificate with multiple named insureds, each with their own coverage list.
<Certificate>
		  <NamedInsureds>
			<Insured>
			  <Name>Acme Manufacturing LLC</Name>
			  <Coverages>
				<Coverage><Line>General Liability</Line><Premium>4,200</Premium></Coverage>
				<Coverage><Line>Property</Line><Premium>6,800</Premium></Coverage>
			  </Coverages>
			</Insured>
			<Insured>
			  <Name>Acme Logistics Inc</Name>
			  <Coverages>
				<Coverage><Line>Auto Liability</Line><Premium>3,100</Premium></Coverage>
			  </Coverages>
			</Insured>
		  </NamedInsureds>
		</Certificate>
Template tags: {#NamedInsureds.Insured}{Name}{#Coverages.Coverage}{Line} — {Premium}{/Coverages.Coverage}{/NamedInsureds.Insured}. The system supports population of XML structures up to 8 levels deep, so this pattern extends to nested tables and lists inside a single output document.
Business users can use the existing templates as-is for PDF generation. They only need to add relevant tags to dynamic fields. Tags should be included in the template to ensure proper population with XML data, for dynamic text, tables, hyperlinks, images, content blocks, etc. Business users can use their favorite Word/PDF editors to add tags. After this, upload the template into the system. Refer to template building for how to go about adding tags.
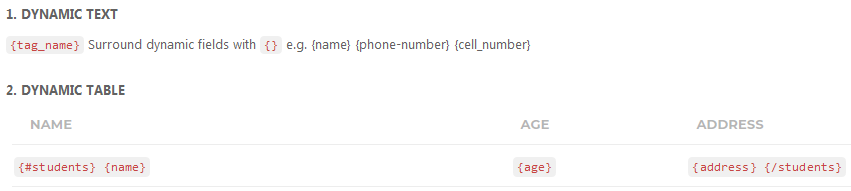
Fillable PDF template
For fillable PDFs, there is no need to add the tags. You can use that template as-is.
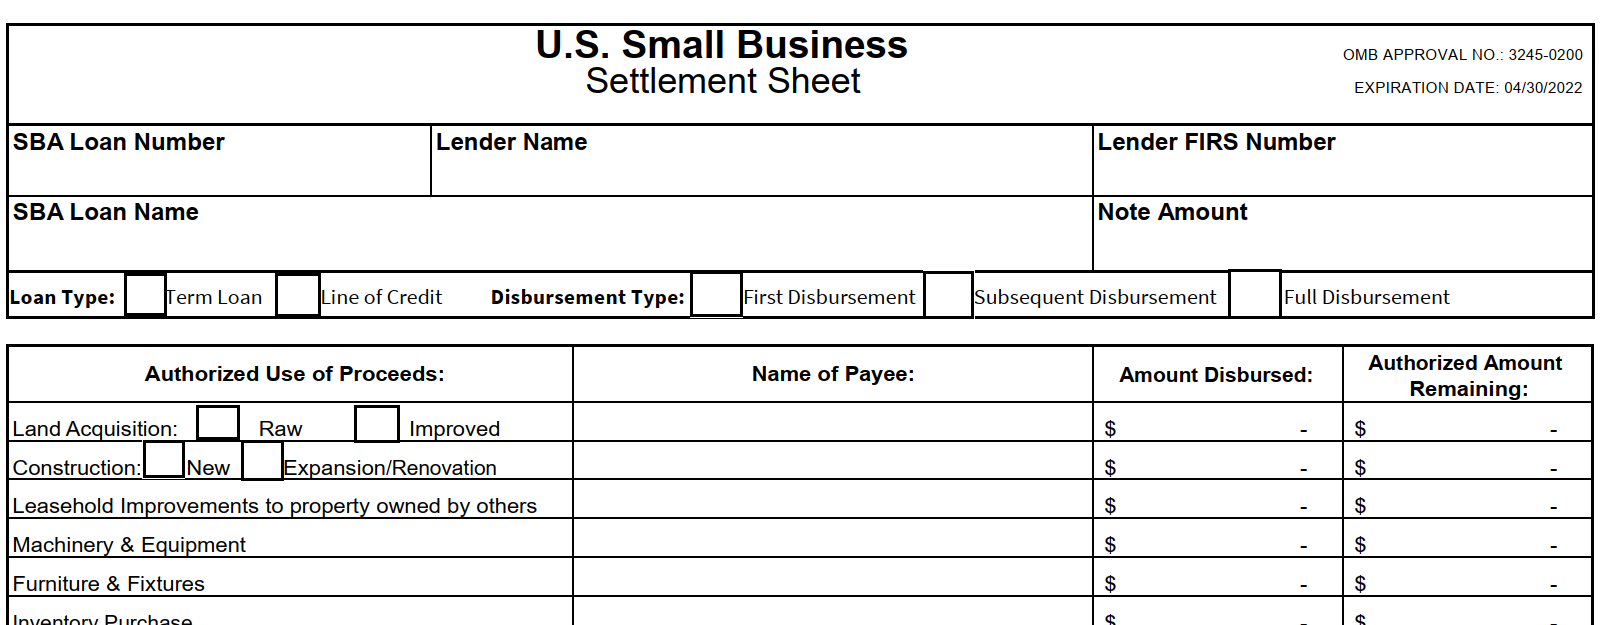
PDF template
In case of a non-editable PDF template, open it in a PDF editor and add tags. After uploading, you can see your template in the template library.
Step1: Upload XML file
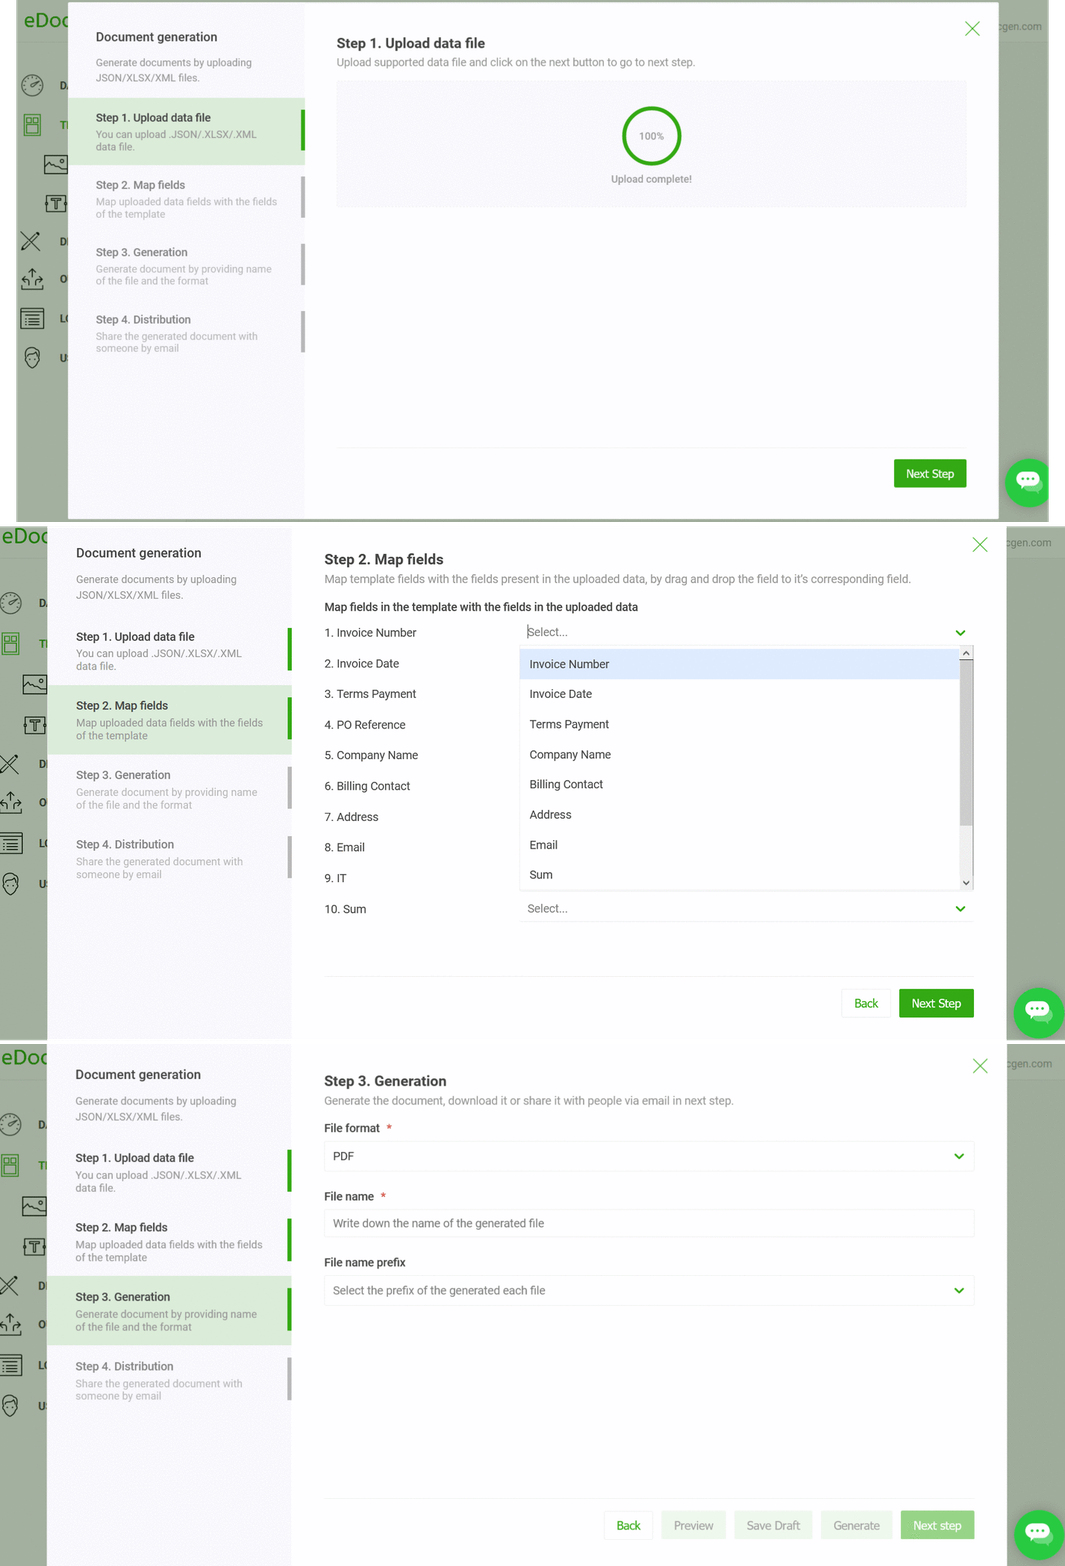
Hover over the document template and click the “Create Document” action button. Select the “generate documents from XML" option and upload your XML file. You can use your existing XML file as-is without any data transformation.
Step2:Map Fields
Map XML elements to the template's dynamic fields in the mapping screen. Accordingly, the system would populate XML into PDF or Word template, giving you control over the data you wish to show on your document. You can skip this step if the XML element names match the template's tag names. In this case, the system automatically maps them for you. If you have a large number of dynamic fields, auto-mapping saves a lot of time.
Step3: PDF generation
In the third step, choose PDF as output file format and click the generate button to create PDF documents in bulk. When multiple documents are created, a zip file with the PDF documents can be found in the output folder. Otherwise, you will notice a PDF document. When creating the PDF, you have the option to set a password for it. Additionally, you can include watermarks during the creation process.
Step4: PDF distribution
This is an optional step. The system offers several channels for document distribution.
Please refer to the working example for a detailed account of how to go about XML to PDF document population.
EDocGen is an API-first product. Thus, you've access to all the features detailed above. Using simple REST-based API, you can generate proposals, invoices, reports, letters, etc. right from your application and databases. The API's performance and scalability benchmarks are some of the best in the industry. You can generate thousands of documents in a few minutes.
Typical uses of the API include:
Out-of-box integrations cover Office 365, SharePoint, and OneDrive, plus a range of databases and CRM systems — so XML sourced from any of those can flow into PDF generation without custom glue code.
Whether you are creating single or multiple documents, EDocGen is the best solution for converting the XML file to PDF documents. Register and start PDF conversion of XML documents.
No. EDocGen consumes XML as-is. Map XML elements to template tags once on the mapper screen, or name template tags to match element names exactly to skip mapping entirely.
Yes. Ap tags (e.g., {FieldName}) to mark dynamic fields — formatting, fonts, headers, footers, and layout stay exactly as they are. Fillable PDF forms need no tags at all.
Yes — {Coverages.Coverage | summation:'Premium' | format_number: ","} sums a value across a looped element and formats it with comma separators, directly in the template.
Up to 8 levels deep, supporting nested tables and lists in a single output document — e.g., insureds → coverages → sub-limits.
Yes, via if-else blocks: {#Field == "Value"} ... {/Field}. Commonly used for language-specific or jurisdiction-specific wording from one master template.
Word templates, non-editable PDF templates (tagged in a PDF editor), and fillable PDF/AcroForm templates (used as-is, no tagging needed).
Yes. POST your XML with a template ID to /api/v1/document/generate and get back a PDF. Supports single on-demand generation and batch generation from an XML file with thousands of records.
Yes — set a password and/or watermark at generation time, and distribute via auto-email, e-sign, document management sync, or cloud storage through built-in integrations.