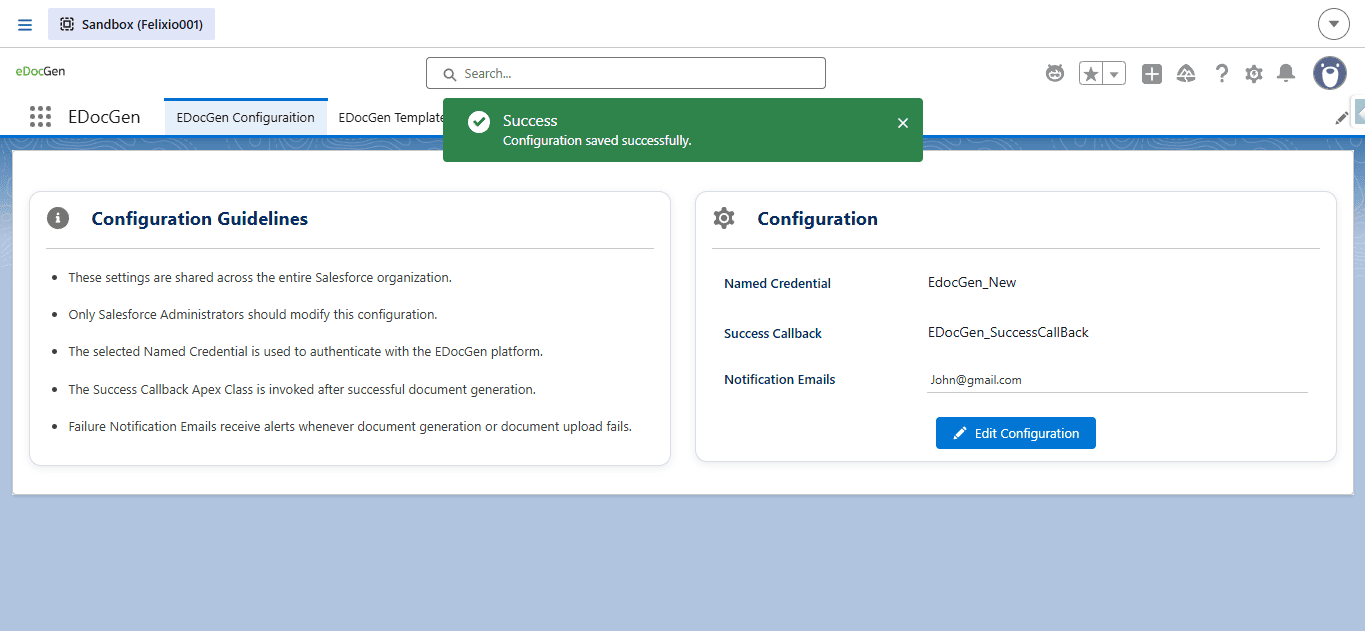
After you install the EDocGen package from AppExchange, complete these steps so Generate Document works: update the Named Credential, create action buttons, and save EDocGen Configuration[cite: 9].
The package includes an EDocGen Named Credential[cite: 9]. Update it with your account credentials so Salesforce can authenticate to the EDocGen server[cite: 9].
[email protected])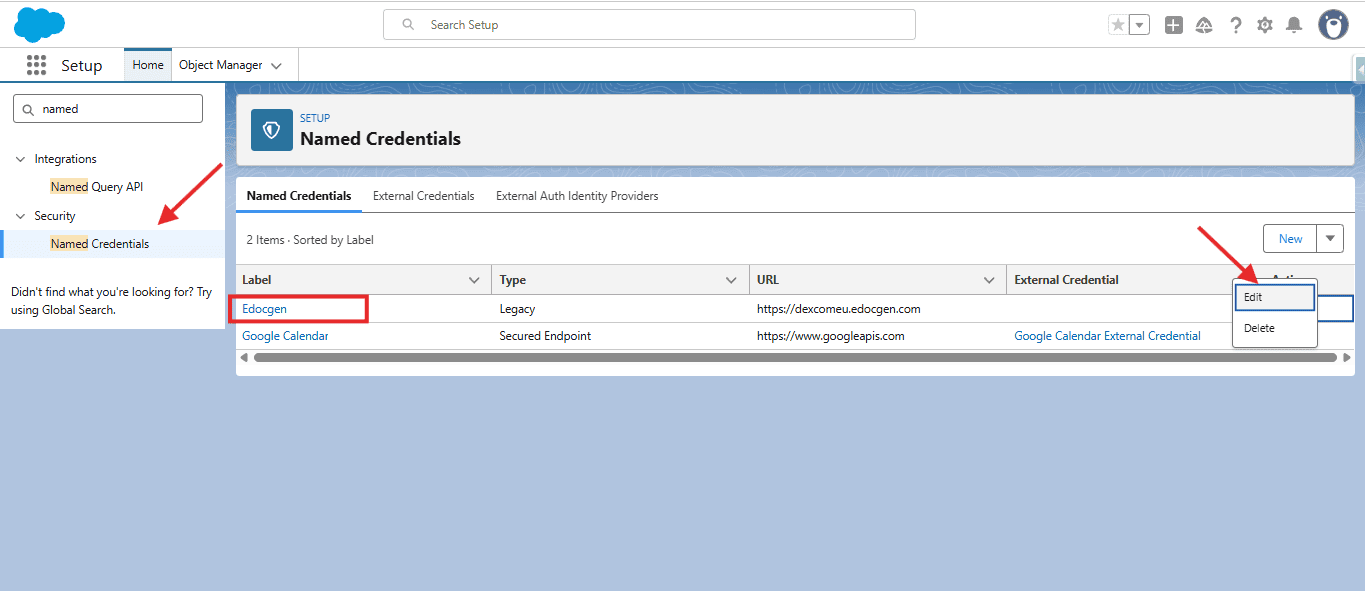
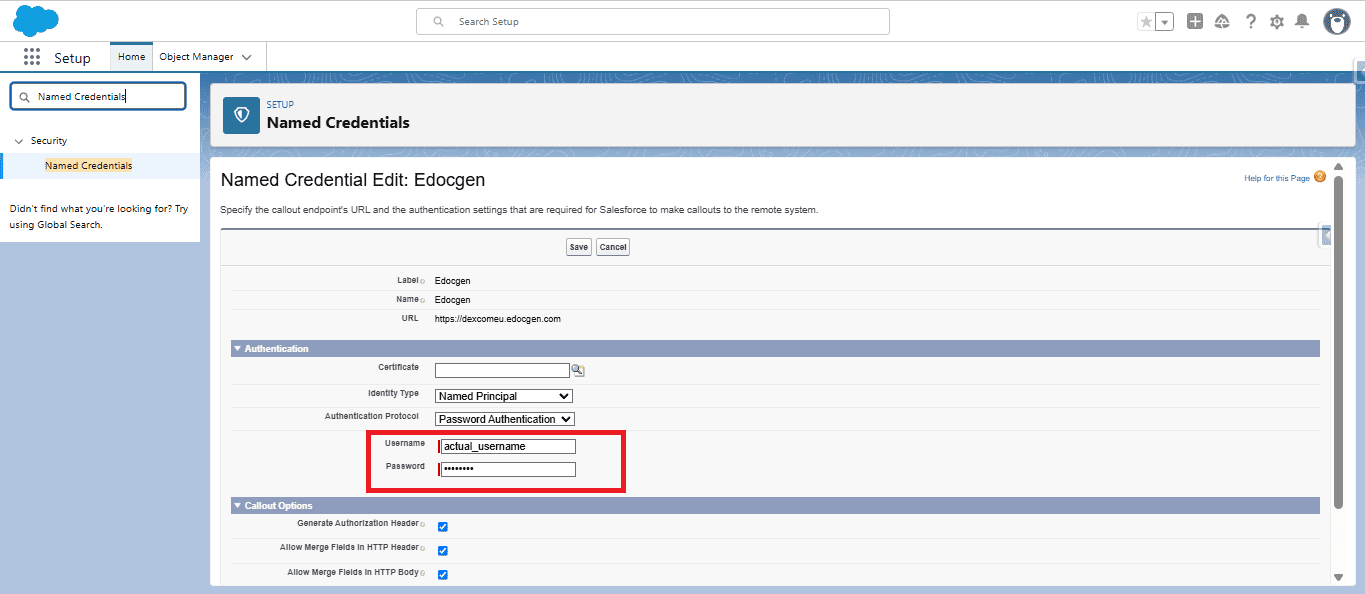
Click Save[cite: 9].
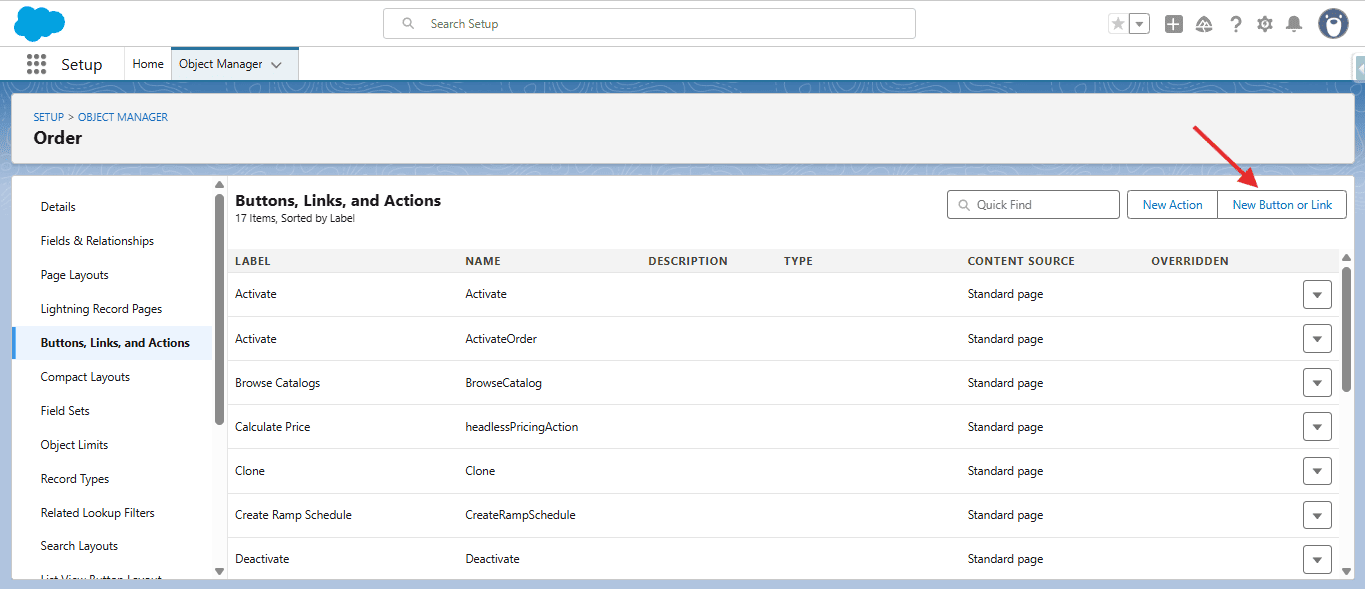
You can add Generate Document on any object (for example, Contract, Order, Account)[cite: 9]. Create a Lightning Action for single-record generation and/or a List Button for bulk generation[cite: 9].
| Field | Value |
|---|---|
| Action Type | Lightning Component[cite: 9] |
| Lightning Component | edocgen:Templates[cite: 9] |
| Height | 250px (default; change if needed)[cite: 9] |
| Label | e.g. Generate Document[cite: 9] |
| Name | e.g. Generate_Document[cite: 9] |
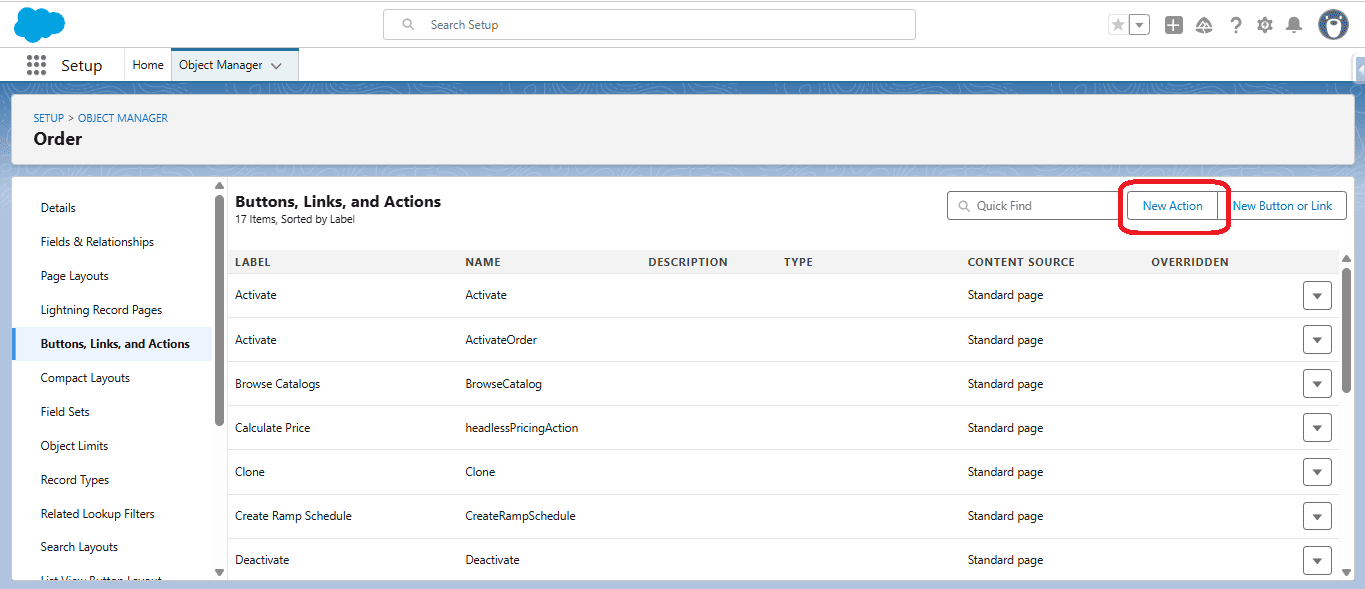
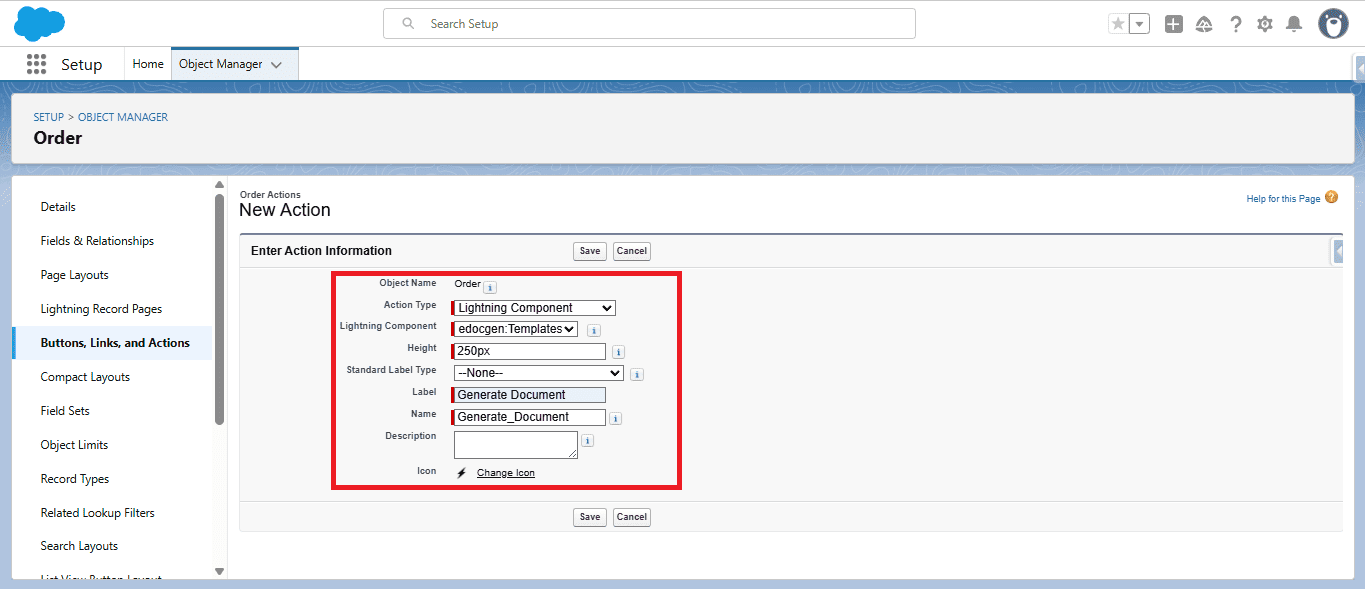
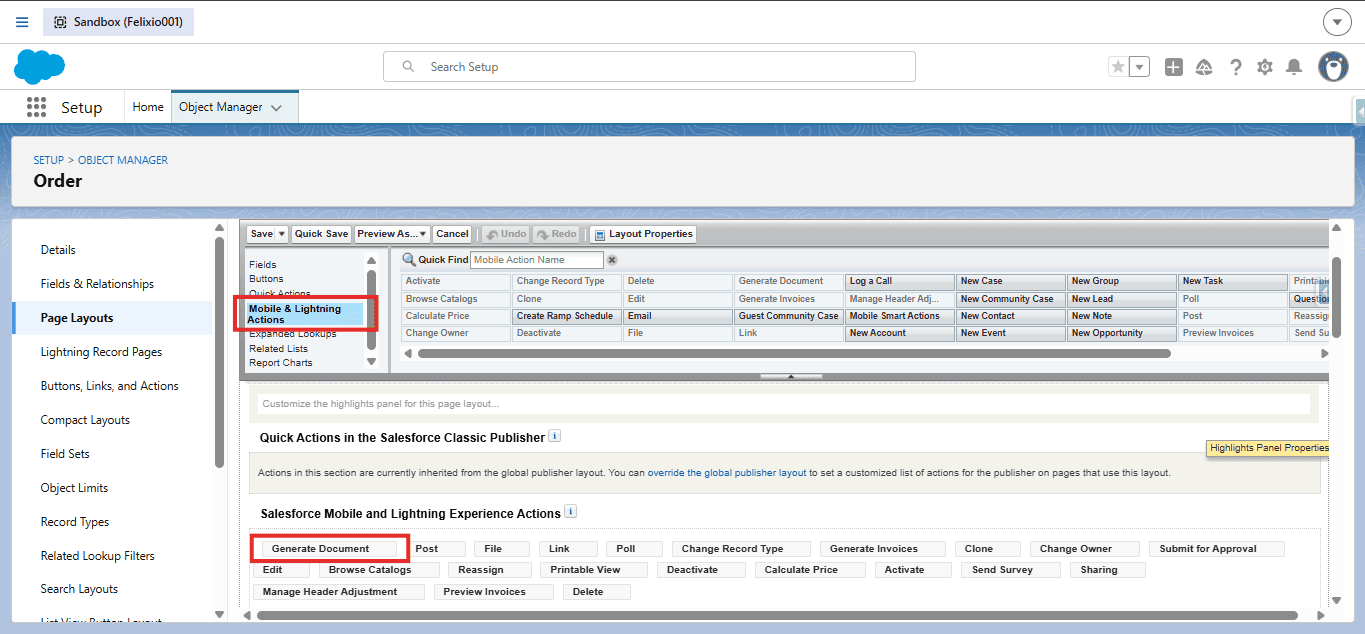
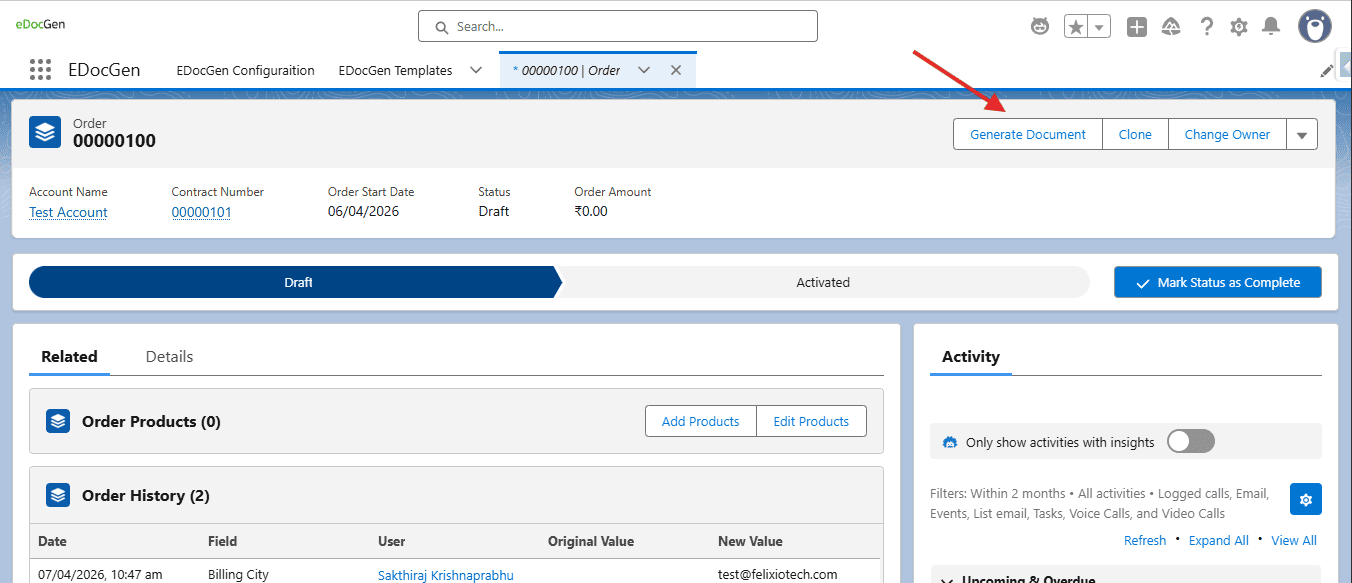
Click Save, then add the action to the page layout[cite: 9]:
| Field | Value |
|---|---|
| Label | e.g. Generate Documents[cite: 9] |
| Display Type | List Button[cite: 9] |
| Behavior |
Display in existing window with sidebar or without sidebar or without sidebar or header[cite: 9] |
| Content Source | URL[cite: 9] |
| URL | /flow/edocgen/EDocGen[cite: 9] |
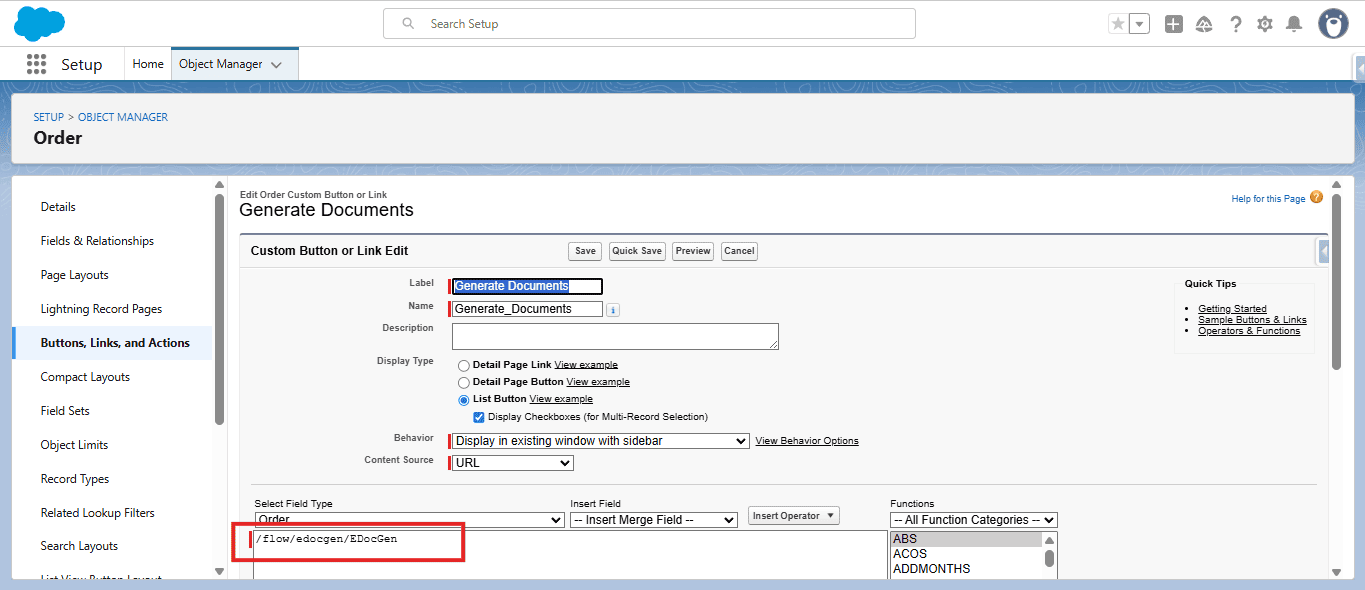
Attach the button to the list view[cite: 9]:
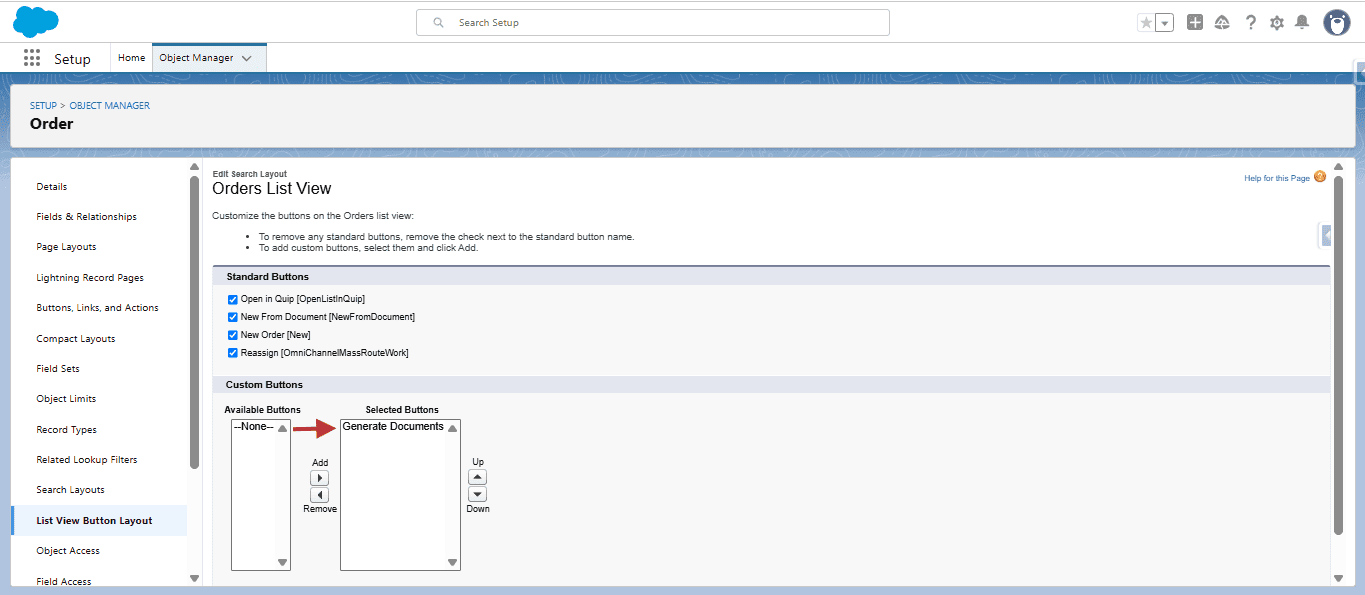
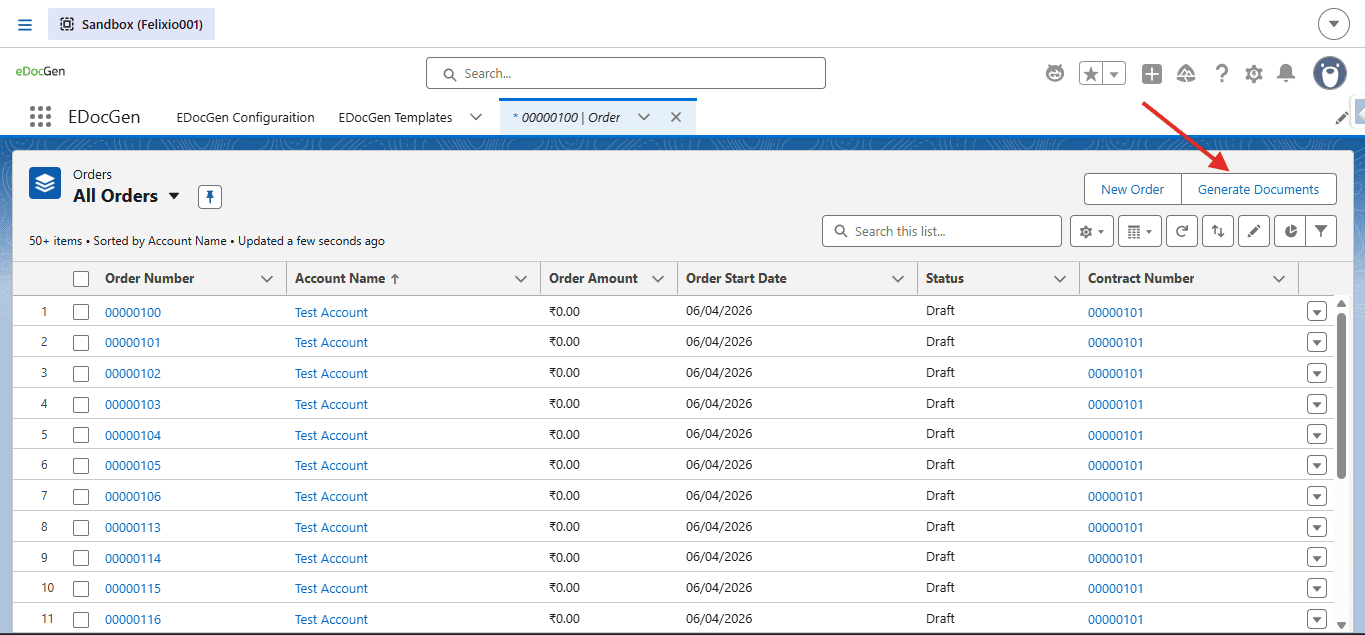
Complete this configuration before generating documents[cite: 9].
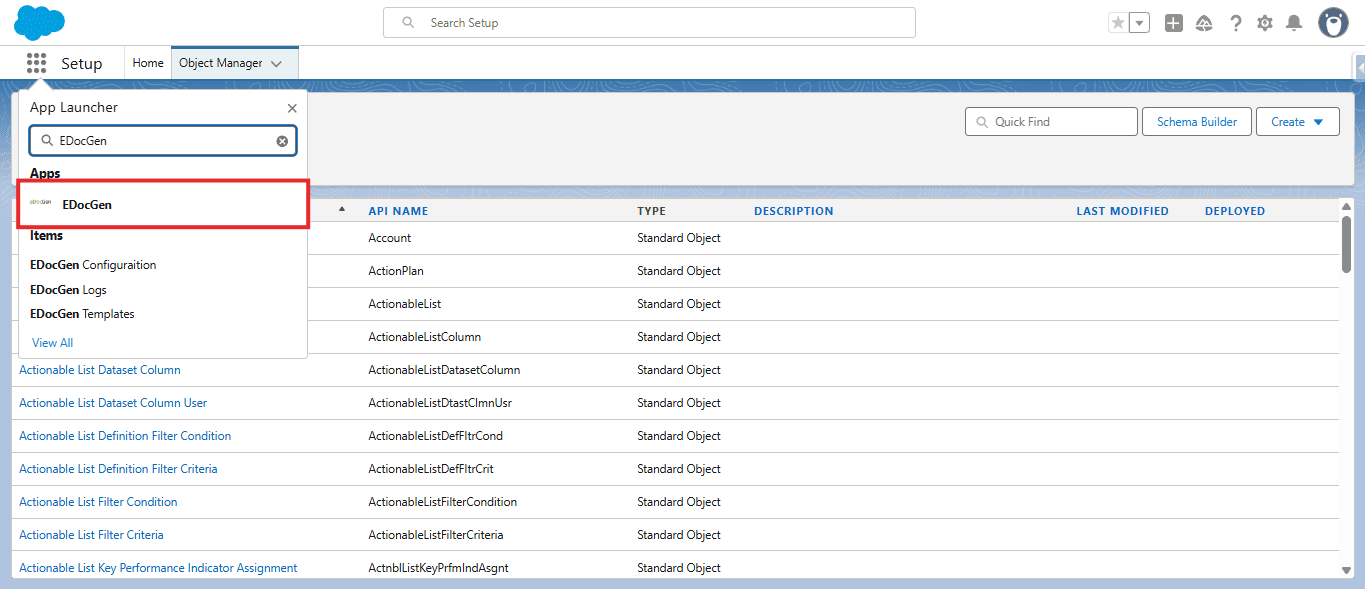
The page shows Configuration Guidelines and Configuration Details[cite: 9]:
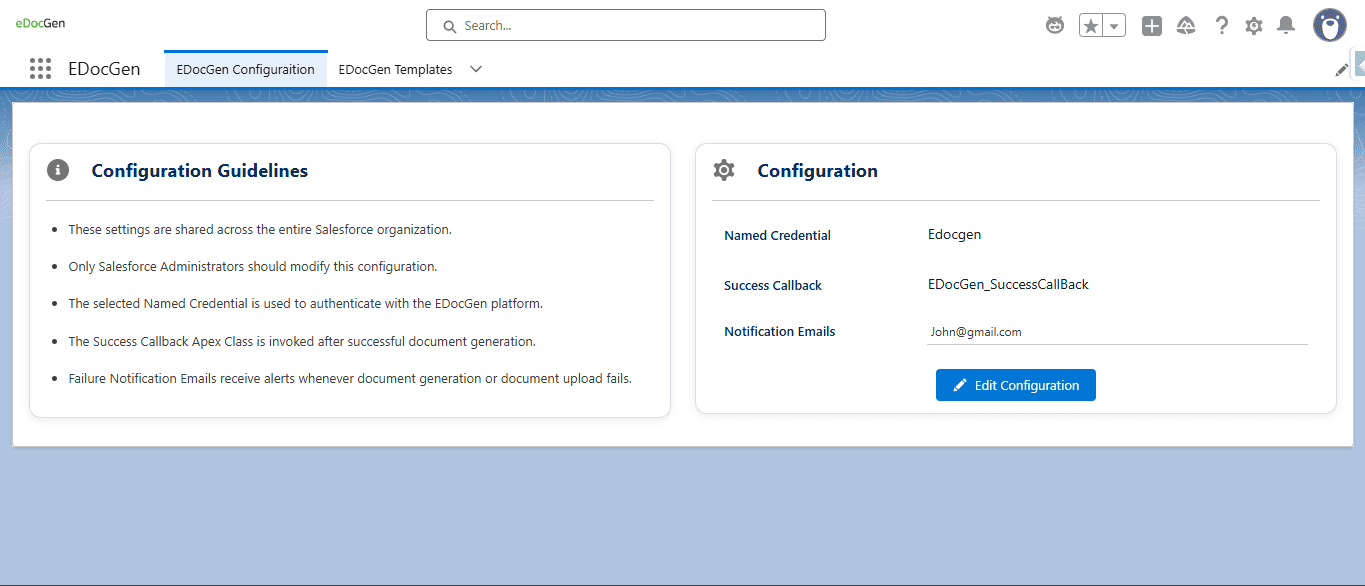
Click Edit Configuration to update the fields below[cite: 9].
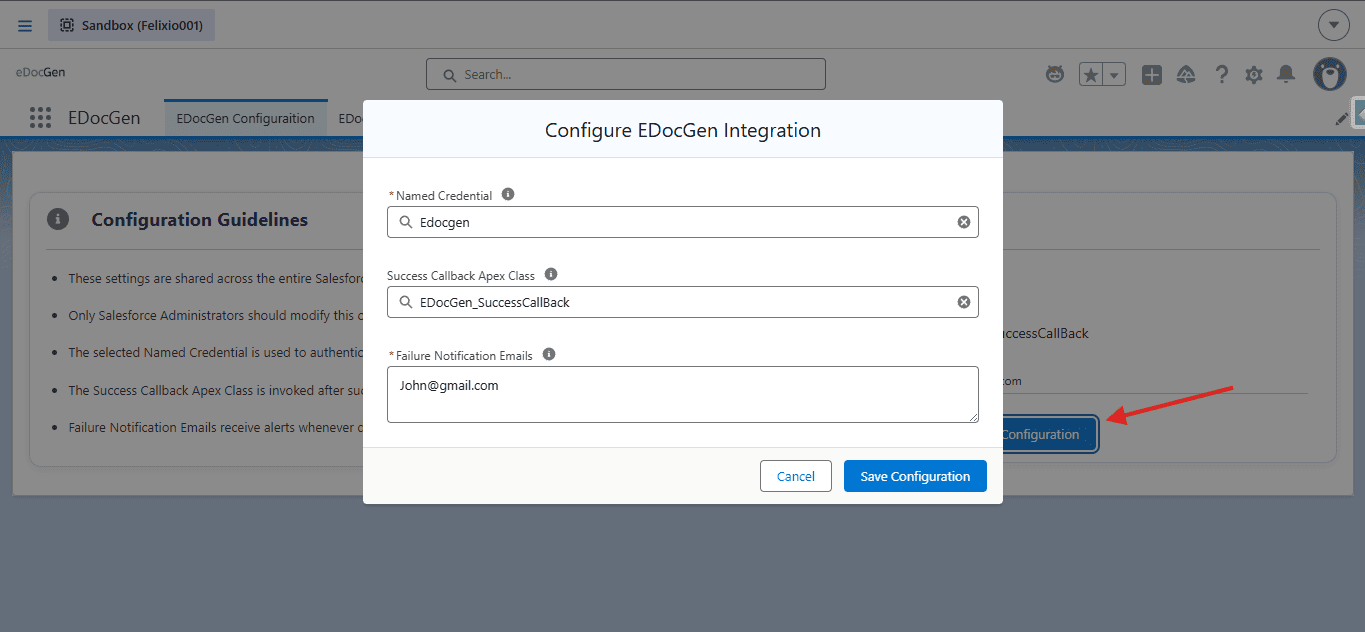
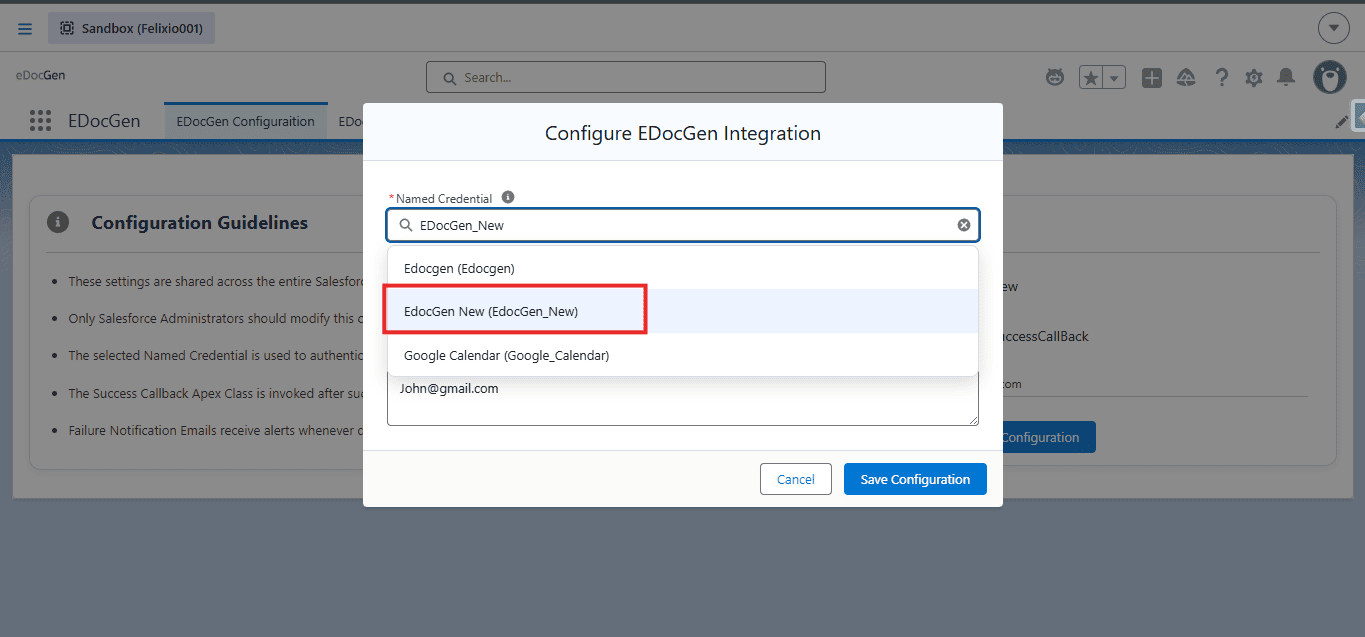
Choose which Named Credential EDocGen uses for document generation[cite: 9]. In most orgs, select the package-provided EDocGen / Edocgen credential (after you set username and password in Setup)[cite: 9].
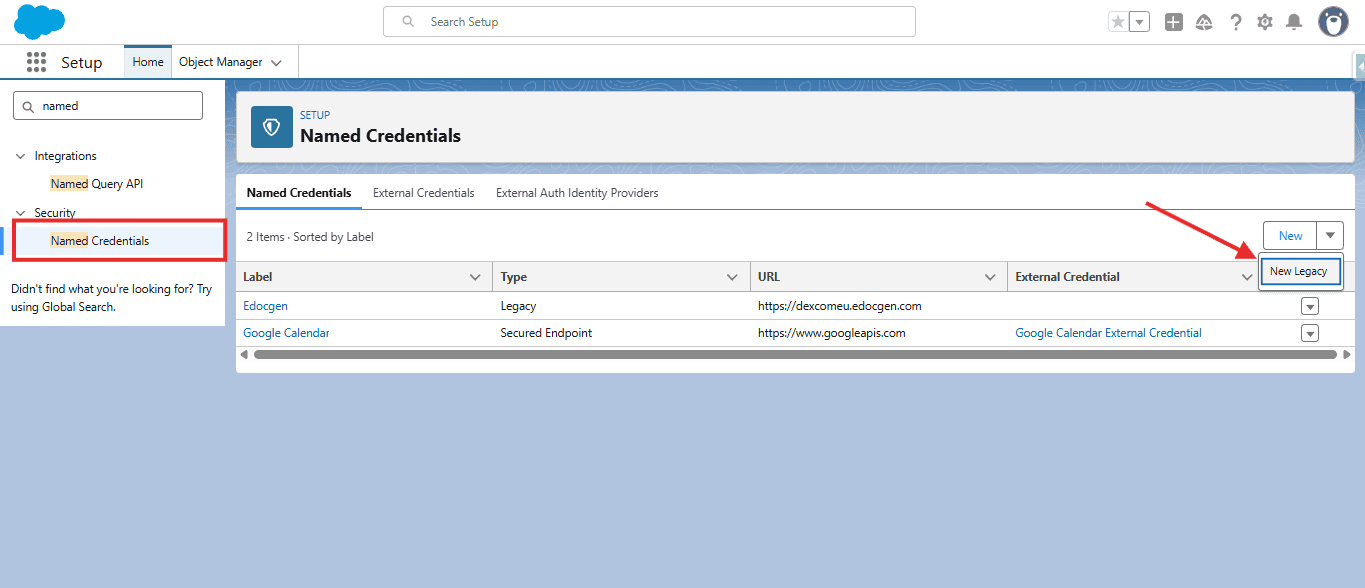
To connect a different EDocGen environment, create a new Legacy Named Credential with details from EDocGen Support, then select it here[cite: 9].
https://app.edocgen.com or another environment URL)[cite: 9]| Field | Example / guidance |
|---|---|
| Label | EDocGen New[cite: 9] |
| Name | EDocGen_New (API name)[cite: 9] |
| URL | Server URL from Support (e.g. https://app.edocgen.com)[cite: 9] |
| Certificate | Leave blank[cite: 9] |
| Identity Type | Named Principal[cite: 9] |
| Authentication Protocol | Password Authentication[cite: 9] |
| Username / Password | Values from EDocGen Support[cite: 9] |
Optional. Specify an Apex class that EDocGen calls after a document is successfully generated and uploaded[cite: 9]. Use this for custom business logic (update records, notify users, chain automation)[cite: 9].
global[cite: 9].edocgen.ConnectorToOrg.ConnectorInterface[cite: 9].global void handleDocumentGenerateSuccess(Map<String, String> generateSuccessMap)[cite: 9].global class EDocGen_SuccessCallBack
implements edocgen.ConnectorToOrg.ConnectorInterface {
// Called by EDocGen after successful document generation.
global void handleDocumentGenerateSuccess(Map<String, String> generateSuccessMap) {
System.debug(
'Inside EDocGen_SuccessCallBack.handleDocumentGenerateSuccess: '
+ generateSuccessMap
);
// Add your custom business logic here.
}
}The callback runs only after EDocGen successfully generates and uploads the document[cite: 9]. After saving the class, enter the class name in Success Callback Apex Class on the Configuration page[cite: 9].
generateSuccessMap| Key | Description |
|---|---|
templateId |
Template Id used for generation[cite: 9]. |
objectAPIName |
API name of the Salesforce object[cite: 9]. |
recordIds |
Comma-separated successful record Ids[cite: 9]. |
recordIdWithContentVersionIdMap |
JSON string: Record Id to ContentVersion Id for each generated file[cite: 9]. |
// Example
generateSuccessMap = {
  templateId = a0BXXXXXXXXXXXX,
  objectAPIName = Account,
  recordIds = 001XXXXXXXXXXXX,001YYYYYYYYYYYY,
  recordIdWithContentVersionIdMap = {
    "001XXXXXXXXXXXX":"068AAAAAAAAAAAA",
    "001YYYYYYYYYYYY":"068BBBBBBBBBBBB"
  }
}
Need full code snippets and invocation options? See the complete Apex Quickstart Guide[cite: 9].
Enter one or more email addresses that should receive alerts when document generation or upload fails[cite: 9]. Separate multiple addresses with commas[cite: 9].